
{ Images :: some of my recent macaron creations }
Top row: Lavender macarons, Champagne macarons, Liquorice macarons
Middle row: Blueberry macarons, Lemon macarons, Passionfruit macarons
Bottom row: Pistachio macarons, Rose macarons with raspberry cream, Caramel macarons
 There it was. I felt legitimised. For close to two years I have been obsessing about these petit French treats. And finally there they were. Boldly emblazoning the front cover of arguably the country’s finest food magazine, Gourmet Traveller. I am talking about, of course, French macarons.
My family, friends and work colleagues have been subjected to a barrage of commentary relating to my trials and tribulations with the French macaron. I have only come across a handful people in Australia who share a similar passion (read: obsession). But the masses? Many people (well, in Brisbane anyway), are unfamiliar with the French macaron. Most connect the word macaron to the equally delicious, but considerably less tricky to make, coconut macaroon.
Does this front cover exposure mean French macarons could swiftly gain popularity here in Australia? Could the French macaron rapidly become the new cupcake? The cupcake is undeniably popular and continues to reign in many circles. The surge in cupcake celebrity, however, has brought with it the inescapable poor, cheap imitation.
Is it inevitable that sub-standard macarons may start appearing across the country? There is a risk. But I am happy for the attention to be elevated on these little treats. It would be a dream to have just fraction of the range and quality of macaron available here in Brisbane that equals Ladurée, Pierre Hermé and Gérald Mulot. Could it happen? We will see.
For now, I will continue to make my own. Given my recent focus on macarons as favors for my upcoming wedding (and my obsession in general), I have been getting considerable more practice on my macaron recipe. I thought I would put together some tips and hints for budding macaron aficionados who want to tackle these delicate little sweets for the first time.
{ French macarons :: My ‘how to’ }
 The first time I made French macarons, I simply picked up a recipe and followed the instructions line by line. When the shells I produced did not mirror the accompanying photo in the cookbook, I was a little miffed. Since then I have made countless batches of macarons, I have fiddled with seemingly minor details to ‘perfect’ the recipe for me. Looking back on that first recipe, I realise how much is not often explicitly explained.
{ Methods }
There are three methods of making macarons.
French :: Beaten egg whites (French meringue) added to almond mixture.
Spanish :: Beaten egg whites (with higher sugar content), added to almond mixture.
Italian :: Cooked sugar added to egg whites (Italian meringue) added to almond mixture.
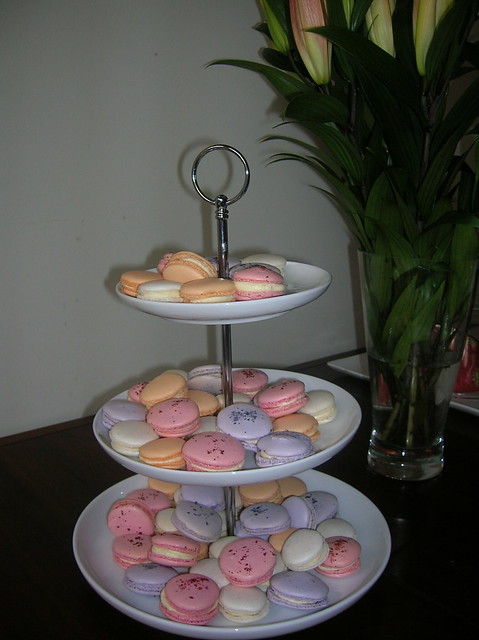
The most successful macarons I have made have been with the Italian method. This is the most stable macaron recipe. The focus of my tips and hints is around this version, though many of the techniques apply across all three versions. (NB: all the images of my macarons featured above have been made using the Italian method.)
{ Standard macaron recipe }
Italian meringue method
* Ingredients *
100g egg whites
3g egg white powder
125g almond meal
125g icing sugar
Food colour (optional)
For the syrup:
150g sugar and 50ml water
* Directions *
Process the almond meal and icing sugar together. In a mixer, add half the egg whites with the egg white powder. Whip to soft peaks. Meanwhile, in a saucepan bring the water and sugar for the syrup to 117C (or 242F) on a candy thermometer. Once ready, slowly add the boiling syrup to the egg whites and continue to whip on medium speed until they thick and shiny and are completely cooled (about 10 minutes). At the final changes of whipping the meringue, add the food colouring (if using). Mix the remaining egg whites to the sifted almond mixture and fold into the meringue in four parts.
Pipe macarons on lined baking sheets. Double up your baking sheets if you do not have professional grade quality. Let your macarons sit at room temperature for 30-60 minutes. Bake at 140C or 280F for 15-18 minutes (depending on size). Fill with ganache or filling of your choice. Refrigerate to set.
Depending on your size, the standard macaron recipe should make between 20-25 finished macarons – around 40-50 unfilled shells.
{ Tips on the ingredients }
1. The egg whites must be aged. That means separating your eggs and leaving the egg whites uncovered at room temperature for 24-72 hours (preferable 72 hours) before using. This provides an element of evaporation while still maintaining the protein level.
2. Egg white powder. For extra insurance, I always use additional egg white powder to provide further stability.
3. The almond meal ideally is allowed to dry at room temperature for up to one week prior to using.
4. The icing sugar must be pure 100% sugar. No added starch.
{ Tips on the directions }
1. Pay careful attention to processing the almond meal and icing sugar (tant pour tant) together. Do not over mix. With the fat content of the almonds, too much processing can make the mixture oily. Tip – add vanilla in tant pour tant to reduce oil leakage.
2. I begin to mix my egg whites (and egg white powder) in a stand mixer on medium speed just before I bring my water and sugar to the boil. They need to come together at the same time. The coordination is critical. Do not stop mixing your egg whites if your sugar is not ready. Turn the mixer down to the lowest speed until your sugar reaches temperature.
3. The temperature of your sugar and water is key. Too low and the meringue will not be stable enough. Too high and the meringue will be too stiff. When the thermometer reaches 115C I turn it off. By the time the saucepan reaches the stand mixer, it has continued cooking and reached 117C. This is my magic number.
4. Incorporating all the final ingredients together is the trickiest part I have found. Severely under mix and you get stiff, ugly, bumpy macaron shells. Slightly under mix and you get dull but flat macarons. Over mix and you get ill-shaped, cracked macarons with no feet. Mix perfectly and you get a shiny shell with perfect little feet. (Can you see how it is easy to become obsessed?) It is sometimes hard to gauge, but practise does help.
5. I usually mix the first quarter of my Italian meringue in the almond mixture quite roughly. This is mostly to break up the mixture. The next additions are a little more careful. The technique that works best for me is one that I learned at Savour. Apparently you can tell if someone is mixing their macaron mixture correctly by the angle of their elbow! Your elbow should be close to your body and moving back behind you as you work the mixture. You need to lift the mixture away from you starting from the centre / middle of the bowl. You need to make quarter turns each time. Basically you are pulling up and dropping down the mixture each time. You often hear that the mixture is ready when it ‘flows like magma’. I do not know what that really means. I look for a shine to the mixture. I also test by lifting up a spoonful and seeing how it flattens out. You want the mixture to flatten but still hold its shape a little.
6. Piping can be tricky. I now pipe my macarons by eye. They are not all 100% completely uniform, but they are close now. When I first started, I needed a little guide. I drew up a ‘circle template’ with a dark pen and put under the parchment paper I was using. Believe me, when you are making 100 of these at a time, you do not want to draw 100 circles! Once you are more confident, you will pipe with more ease. I usually hold a piping bag directly over the baking tray and pipe out for a few seconds. I pull the bag away quickly once I am done to diminish the likelihood of a peak.
7. The ideal way to pipe your macarons is to alternate the rows. This helps airflow in the oven. For example, pipe six macarons on the first row and then five macarons between the six on the second row etc.
8. You know when your macaron mixture is at the right consistency once you have piped. When you pipe them out, they should have a slight peak. However, this peak should slowly disappear to a smooth finish. By the time you have finished piping one complete tray, the first few rows should be sitting perfectly.
9. I always tap the tray when I have finished piping. This helps eliminate potential air bubbles.
10. Rest time can vary. I usually leave my macarons about 30 minutes before baking. But with a few batches, some are baked sooner, some are baker later. The main thing is that there is a bit of a skin formed on the macaron before you put it in the oven. Delicately touch the macaron. If your finger does not leave a mark, then they are ready.
11. Always, always, always use double baking trays if you do not have professional grade. If you do not double up, your macarons will burn too quickly.
{ Tips on experimentation }
1. You need to check your oven temperature. If you do not have one already, buy an oven thermometer. You may be surprised how different that temperature reads to the dial on the front.
2. Watch out for hot spots. I have some in the back of my oven where it is extra hot. You will need to test for your own.
3. Experiment baking macarons between 140-160C. I have the best success at 140C but others equally so at a slightly higher temperature. Each oven can be different.
4. Experiment with resting time. I sometimes have success popping in a batch of macarons just after piping but also let others rest for 1-2 hours.
5. If you are using colour, note that this will fade ever so slightly in the oven. So if in doubt, add a little extra.
6. Humidity can cause havoc with macaron making. Ideally make these tricky little treats on a dry day. Well, your first time anyway!
I will endeavour to keep this updated as I test new recipes and techniques. I have a new recipe that I am about to tackle. Not sure if I should tempt fate, but I am too excited by the prospect of experimenting further.
To everyone that has left me comment in the past on one of my macaron posts saying they have never tried to make macarons, please give them a try. I would love to see how you go. Though be warned. Once you start, it is hard to stop. It is infectious. Bonne chance!
{ Acknowledgements }
I need to acknowledge the following outstanding and accomplished chefs who have shared some of their secrets of macaron making with me.
Chef Patrick Leclercq :: Head Patisserie Chef @ Gérald Mulot, Paris
This man is responsible for creating many of the macaron flavours at Gérald Mulot. Gérald Mulot is an institution in Paris. I was fortunate to experience macaron making first hand in the 13th arrondissement boutique. And with the aid of a translator (!) was able to glean considerable tips.
Chef Andreas Stossel :: Head Patisserie Teacher @ Southbank Institute of Technology, Brisbane
This Swiss trained Chef not only has given me valuable tips on pastry making, but also many tips and tricks to fuel my macaron obsession.
Chef Paul Kennedy :: Savour Chocolate & Patisserie School, Melbourne
A complete fountain of knowledge, Paul has explained, in depth, macaron making including the three key methods that are typically used. My full day macaron class in Melbourne earlier this year truly solidified my obsession (yes, I would fly interstate to attend a macaron class!), and some outstanding questions.
I would also like to acknowledge some great web-based macaron references that I have also used in my macaron endeavours. These references have been invaluable for me to gain understanding the real science behind the macaron.
Mercotte
This is a tremendously comprehensive reference to macaron making. This English version provides a great overview of how to tackle these tricky little petit fours.
Tartelette
Helen not only provides easy to understand direction around her macaron making, but she always produces such imaginative creations. Her enthusiasm for macaron making shines through. A pleasure to read.
Syrup and Tang
Duncan’s detail on the different macaron methods is so inclusive and clear. I found his step-by-step guides vastly helpful in understanding the technicalities of macaron making.
Lemonpi
And a special thank you to Y, at Lemonpi who has given me countless tips and encouragement throughout my macaron endeavours!

June 30, 2009 at 3:03 pm
What fabulous creations! You are a macaron expert!
Cheers,
Rosa
June 30, 2009 at 11:57 pm
Hi, Julia,
You are truly amazing. The pictures are gorgeous. -Tien
July 1, 2009 at 7:14 am
WOW !! What a post !! This one’s a keeper. I think it was in your last post, I said it would be so pretty to see one of each macaron together – well your photos above achieve that beautiful macaron rainbow!
I know I am not alone in appreciating the time you spent to put this post together – with such valuable and truly helpful information here for us readers and bakers alike! All of your past trials and time spent, and passion too, all went into this, and it shows. Bravo !!
Bonne chance a toi aussi,… with your new technique. And again, merci !
July 1, 2009 at 9:07 am
LORDIE!
Very detailed and complete..I think I’ll stick to my paintbox
But THANK YOU!!!
Carolg
July 1, 2009 at 12:11 pm
Julia, what a wonderful resource this post is going to be! I’m going to link to it every time I post about macarons from now on.
July 1, 2009 at 8:58 pm
I just saw the cover too and got very excited!!! I’ve only made 2 batches (none very well so far, especially since my oven is too hot and I didn’t have a sugar thermometer.) Thanks for the tips though, as I hope to make some more soon and try to perfect them. I do hope they become the new “cupcake”, it would be great to have more good quality macarons out there.
July 1, 2009 at 11:23 pm
I am soooo using this post in the future, darling! My last macarons ended up in the garbage can, so your instructions will be very useful – tks!
July 2, 2009 at 1:24 am
Ok … I’ll go for French macarons now ^^ … with all those great tips I hope I’ll produce something looking similar to yours one time 🙂 …
July 3, 2009 at 2:18 am
love, absolutely love you post about macarons. I’ve never tried this beautiful treat because I’m so scared of messing it up (not getting the right crunch, missing the “collerette”) Great detailed explanation. Thanks!
July 3, 2009 at 9:37 am
they are fantastic, and i do think your rose macarons pretty enought to be on the GT cover themselves! great tips–i’ve never made them using the italian meringue method, but have heard others reccommend it as well.
July 5, 2009 at 9:29 am
As always, a beautiful blog. Thanks for the wonderful explainaiton.
I am currently looking after an elderly ill friend so don’t have much time. Hopefully soon I will be able to make them.
My friend ‘J’ came back from Paris raving about them and wondering where to find the recipe. Being a researcher by trade, this started me off on yet another tangent. I have been collecting articles and printouts on macaroons for over 1 year. I still haven’t made one. We now have ‘Jones The Grocer’ at Chadstone, Melbourne who makes a pretty good one. The first one I tried there was like a meringue, dry and crisp but now with a new French Chef, my friend ‘J’ has given the thumbs up.
July 6, 2009 at 4:50 am
I find the au sucre cuit method more difficult actually than the french meringue method. maybe because i am used to it.
July 6, 2009 at 5:57 pm
Those are some beautiful cupcakes, and I love the idea of an apple pie cupcake! I wonder if my 5-spice apple filling could be used in those? 🙂 Gorgeous job as always!
July 6, 2009 at 5:58 pm
BTW..NO NO NO to the Red Sox being America’s team..It’s the NY Yankees! 😀
July 9, 2009 at 9:30 pm
Hi Julia
Just wondering where you buy your egg white powder from? Specialty stores? Maybe soon I will delve into macarons… 🙂
Thanks heaps
Anita
July 13, 2009 at 11:58 pm
I totally share your obsession and that cover had me in the kitchen trying them in no time – i figure my next attempt can’t be as bad as my first – your flavours and colours are amazing
July 14, 2009 at 2:24 am
Wow.. great post on how to, I haven’t dare to try the italian style, liquid on the almond meal stil makes me scared 😉
July 14, 2009 at 6:04 am
Where can I buy the 100% icing sugar (no starch added) in my area? I’m in Los Angeles and no one here knows what I’m talking about and all carry confectioner’s sugar that has at least some starch in it.
Also, how can I avoid the air pocket inside the cookie during the baking process? I’ve tried different temperatures and can’t seem to get it right.
Thanks!
Robin
July 14, 2009 at 8:43 pm
Fabulous work and beautiful photos.
Fantastic
July 14, 2009 at 10:00 pm
Hi
I am a fan of your blog since the start of last week (when i found ur blog by chance!) I also did the macaron class w Paul Kennedy at Savour School last month and since then I’ve been hoooookeed and obsessed with these little sweet delicacies that is sooo difficult to make but I finally made a pretty good batch today. I will try the italian method today, just a quick question, where could i find egg whites powder?? I hope you can help me. Thank you and i will post my macaron attempts soon in my blog! thank you!!
July 17, 2009 at 12:44 am
Oh, thanks for breaking down the macaron recipe for the lot of us! First time I attempted to make my own macarons (silly, silly me!) the cookies didn’t rise. They were these flat coins on my baking pans. Never looked at another macaron recipe again!! Could it be that your tips would help an idiot like me be, at the very least, semi-successful? I like that tip about leaving the egg whites out on room temp. for 24-72 hours! Actually, reading all your tips have opened my eyes on so many things. Case in point: I thought all icing sugars are created equally – but really? Cornstarch? Girl, I have a lot to learn! Will definitely stumble this page!
July 25, 2009 at 11:51 pm
Hello!
I really like this post!
It’s incredibly useful (:
What kind are those in the top right corner of the macaron picture mosaic? they have such a pretty colour!
thanks!
July 26, 2009 at 5:15 pm
I agree – I think macarons might be the next cupcake… which I also thought about before seeing the GT cover.
Beautiful work on the macarons, and thanks for the tips. They’ll come in handy if I’m ever courageous enough to try making them at home…
July 30, 2009 at 4:45 pm
I received a number of questions regarding where to buy egg white powder as well as starch free icing sugar / confectioner’s sugar. I replied individually to those questions, but for reference:
For the egg white powder, I purchase mine here in Brisbane from a store called Flannerys. They are a natural food grocer – http://www.flannerys.com.au. In Melbourne, you could try Essential Ingredient or the Melbourne Food
Ingredient Depot in East Brunswick. In Sydney, you could also try Essential Ingredient. I find if a big supplier (like Essential Ingredient) does not stock something, they will typically know where it is sold.
For starch free icing sugar / confectioner’s sugar, you can purchased that in Coles and Woolworths/Safeway here in Australia. When in the US, I would purchase something like this from my local Bread and Circus store – http://www.wholefoodsmarket.com/. Basically you need something labelled ‘gluten free’.
A natural food store is probably your best bet for both of these items.
{ :: :: :: }
Rosa – thank you. Trouble is, there are so many more creations to make!
Tien – thank you very much. Can you tell I’m obsessed with macarons?
Kerrin – I want to even bookmark this myself. Does that sound strange? Too funny about suggesting to put all the images together. Must have been thinking the same thing at the same time, bien sûr. Quelle surprise! 🙂
Carol – if you ever get the chance, I would love to see your macarons. In the meantime, I’ll continue to enjoy your lovely stories and paintings of Paris.
Y – thanks. And thank you so much for all your encouragement, tips and advice.
Anita – I would love to see more macarons around. Good ones. still have my GT lovingly out on the coffee table. 🙂
Patricia – did you use the Italian method last time? I failed every time using the French version. I’ll keep my eye out for a macaron post from you!
gine – I hope you do. That would be fabulous.
Jackie – good thing is, even if your macarons don’t come out perfectly, they still taste great. Enjoy with a little ice-cream or on their own, they are still tasty! 🙂
Steph – oh, thank you. I thought it was funny that I had made the EXACT same flavour combination as the cover of GT. But not necessarily that unique so probably no surprise. Yes, definitely would recommend the Italian method. Next time you have spare egg whites, give it a go!
Corry – thank you. I’ve not tried the macarons from Jones. I compare every macaron I eat to Ladurée. Pretty high standards, but IMHO, they are the best.
msmflo – the Italian method is probably more fiddly, but with a more stable meringue does help me produce a more perfect shell.
Anita – I think I replied to you directly re: egg white powder. Did you find some?
Nicola – I loved your lavender macarons. Lavender is one of my favourite ingredients!!
Zita – it’s not as bad as it sounds. Once you add the sugar syrup to the egg whites you really only need to fold that into the almond meal. Give it a go!
Robin – I think I answered you directly. Did you find any??? How did you go with the air pockets?
Ana – thank you. Amazing what an obsession makes you do!
Emmelyn – yes, that class was great, wasn’t it? I think I answered your question re: the egg white powder. I have been seeing your macaron efforts. Some fabulous flavour combinations!
Jen – you don’t even want to see my first macaron effort. They were a disaster. I hope you try them again with this method. It was my turning point.
Michelle – I think I replied to you directly. The blue macarons are liquorice. Glad you are loving the macaron, too! 🙂
Tina – definitely give them a go. But once you start, it’s hard to stop! Well, it is for me, anyway! 🙂
August 11, 2009 at 8:28 pm
Must be something between me, macarons …& you Julia ~ A strange connection~ Had a macaron disaster day before. Tripped on your bog yesterday & saw the most beautiful macarons.Visited DK this morning & saw you in the spotlight, & discovered you are the Queen of macarons! (left a message for u there).Got tweeting with Manggy a short while ago & wept over my failed macarons. He sent me a few macaron 101 links…& here I am again. Full circle & uber confident after reading this post! Thank you dear girl! You have filled me with hope again!
August 12, 2009 at 12:37 pm
hi i just tried lastnite but the french way and it turned out flat and nothing in the shells, shells were pretty sininga nd good shape but doesnt contain anything. huh! it all came out as a feet, and feet spread so flat…
August 13, 2009 at 6:46 pm
Just a question… is the 100grams of eggwhite the weight before I leave it to sit on the bench for a few days, or afterwards, just before cooking? I just figure there will be some evaporation over the time it is sitting out, and didn’t want some to evaporate off and leave me with not enough egg white!!!
I am going to make these this weekend, I hope they work! Thanks so much for the tips!
August 16, 2009 at 9:55 am
I wante to let you know that I made them yesterday, and they actually worked perfectly!!! I had prepared myself for failure and when I saw their frilly feet I danced around the house, before calling my mum and husband to tell her I had had success! So exciting. I just made plain ones with some chocolate ganache as that was all I have- I am off to the essential ingredient today to get some fancier flavourings.
Thanks so much for the guide, it was a massive help. While many things didn’t go to plan, somehow it all came together in the end. The only thing wrong with them was that I made them a little big (though the 2nd batch was spot on). Otherwise they had a thin, crisp shell filled with silky soft insides, just enough crunch, and a good rise. LOVELY!
THANKS SO MUCH!
August 31, 2009 at 4:18 pm
Here are some pics of the macarons I made using your recipe:
http://www.flickr.com/photos/7608459@N02/3873795714/
They were a hit at my daughter’s first birthday party yesterday. On of my brothers-in-law said they were so pretty it was a shame to eat them! Nevertheless most were devoured with a few spare for my French mother-in-law to take home to enjoy later.
Thanks again for your instructions. I think I know what I am doing now but all the tips and hints were so helpful when I was trying to get my head around all the cooking processes required!
Cherry
September 12, 2009 at 3:58 pm
Hi! Ive tried making macaroons so many times and it’s always a disaster. But today I found your recipe and tried it…its a success..FINALLY! Thank you so much for the recipe and ideas.
September 13, 2009 at 1:36 am
Hi, Julia
I left message yesterday on recipes..
I guess I mixed up name with another girl.
By the way, what Can be the substitution for the egg wht powder?
September 13, 2009 at 11:29 pm
wow…!!
I too was trying hard to get it right…after ur review definately, things are gonna be better.
thanks
September 16, 2009 at 10:28 pm
Amazing amount of work you put into this. I will give them a try soon. Today it rains, must wait. Thanks for you efforts to teach~ ~Ahrisha~ ~
September 21, 2009 at 6:14 am
Hi there!
I just tried Martha Stewart’s macaron recipe (the one you commented on and had a link to your blog), and I can’t say it’s a complete success…
Some of them are cracked (wich I don’t mind), and while the outside is crunchy, the inside is a little too chewy… Maybe I folded the “dough” too much?
Anyway, it was my first attempt at macarons, so considering this, I don’t think they turned out that bad. Next time, I’ll try your recipe, though.
Thank you for the great tips and colorful pictures!
September 24, 2009 at 3:40 am
Thanks for your tips. They were really useful!! Those pictures of macarons you made are mouth watering!
I have tried making macaron a couple of times but they always end up sticking to the baking sheets (been using good quality ones). The soft insides of the macaron falls our everytime i try to remove it from the baking sheets. I only can get a couple of perfect ones each time. Is it because its under-cooked?
Hope you can help me in this.
THanks!!
October 6, 2009 at 4:32 pm
I am wondering if the recipe in Gourmet Traveller for the macs done the French way is also yours? Unlike your great Italian method recipe I’ve not had success with it – not enough icing/almond meal? And 2 egg whites = 105g !? And standing time 4 – 5 hours?? I am thinking it wasn’t yours.
October 12, 2009 at 3:07 pm
wow, your matcha macarons look so cute. It would be a delight to eat them. 🙂
October 15, 2009 at 2:11 am
Thank you!
What a great tips.
I’m going to try this afternoon again, using your tips.
Thank you very much !
October 18, 2009 at 10:04 am
Thank you so much for your fantastic tips! I’ve been trying to get Macarons right for a while (using the French technique). My obsession has been fueled ever since I saw the beautiful front cover of Gourmet Traveller.
Unfortunately, I haven’t found any amazing Macarons to taste test in Brisbane. Any suggestions?
I’m off to get some powdered egg white from Taringa and hopefully get a little closer to the perfect macaron this afternoon.
BTW – I understand your reason for flying interstate to go to Savour. I went there in August for the level 1 chocolates and praline. If only I lived in melbourne – I’d be there any time I had some spare money to do a different course. Paul is a fantastic teacher.
October 19, 2009 at 12:49 pm
But Lisa don’t use that recipe for the French method from Gourmet Traveller – lots of things wrong with it. If you aren’t game to try Julia’s wonderful (and practically foolproof) Italian method recipe, use Tartelette’s French method one.
October 19, 2009 at 2:32 pm
Thanks for the tip Jude. I appreciate your help.
October 19, 2009 at 11:34 pm
Thanks for all the tips. I’m trying these this week and have my egg whites aging right now. I’m not really sure how to get the pretty colors like the light blue ones with chocolate that you picture. Do you mix green and blue and then try it out in water or something else before putting into your egg white. I sure don’t want to waste this $13 bag of almond meal. I really want to make some purple ones because I picked up some purple and pink m&M’s in NYC and I want to use these for garnishing.
October 27, 2009 at 7:29 am
[…] simple recipe Syrup and Tang – a recipe that involves three Daring Bakers to change the lightbulb Melanger – a more stable Italian […]
November 6, 2009 at 8:44 pm
Hi Julia,
Thank you for the great article on french macaroon. I baked keklapis or layered cakes which used many egg yolks and as a result i have a lot of egg whites..I will definitely try your method and will feedback on website. Will let you know the outcome. Thank you so much!
November 7, 2009 at 7:58 pm
[…] make the macarons I followed the awesomely detailed tutorial at Melanger. This recipe uses Italian Meringue […]
November 13, 2009 at 11:15 am
Thank you!! Thank you!!!!!
November 13, 2009 at 11:21 am
One question: These don’t keep at all, is that correct? They must be eaten the same day they are baked?
November 18, 2009 at 10:36 am
Hi Julia,
I have my french macaron’s result on my website. Please visit at http://www.keklapis.com to have a loook.
Thanks a lot dear!